gpt-image-2
ChatGPT PlusまたはProの契約を利用し、Claude環境内でGPT Image 2を使って画像生成や編集、スタイル変換などができ、追加のOpenAIアクセスや画像ごとの課金は不要で、テキストや画像を元に様々な画像を作成・編集するSkill。
📜 元の英語説明(参考)
Generate images with GPT Image 2 (ChatGPT Images 2.0) inside Claude Code, using your existing ChatGPT Plus or Pro subscription — no separate OpenAI access, no per-image billing. Supports text-to-image, image-to-image editing, style transfer, and multi-reference composition via the local Codex CLI. Triggers on "gpt image 2", "gpt-image-2", "ChatGPT Images 2.0", "image 2", or any explicit ask to generate or edit an image through the user's ChatGPT plan.
🇯🇵 日本人クリエイター向け解説
ChatGPT PlusまたはProの契約を利用し、Claude環境内でGPT Image 2を使って画像生成や編集、スタイル変換などができ、追加のOpenAIアクセスや画像ごとの課金は不要で、テキストや画像を元に様々な画像を作成・編集するSkill。
※ jpskill.com 編集部が日本のビジネス現場向けに補足した解説です。Skill本体の挙動とは独立した参考情報です。
下記のコマンドをコピーしてターミナル(Mac/Linux)または PowerShell(Windows)に貼り付けてください。 ダウンロード → 解凍 → 配置まで全自動。
mkdir -p ~/.claude/skills && cd ~/.claude/skills && curl -L -o gpt-image-2.zip https://jpskill.com/download/10351.zip && unzip -o gpt-image-2.zip && rm gpt-image-2.zip$d = "$env:USERPROFILE\.claude\skills"; ni -Force -ItemType Directory $d | Out-Null; iwr https://jpskill.com/download/10351.zip -OutFile "$d\gpt-image-2.zip"; Expand-Archive "$d\gpt-image-2.zip" -DestinationPath $d -Force; ri "$d\gpt-image-2.zip"完了後、Claude Code を再起動 → 普通に「動画プロンプト作って」のように話しかけるだけで自動発動します。
💾 手動でダウンロードしたい(コマンドが難しい人向け)
- 1. 下の青いボタンを押して
gpt-image-2.zipをダウンロード - 2. ZIPファイルをダブルクリックで解凍 →
gpt-image-2フォルダができる - 3. そのフォルダを
C:\Users\あなたの名前\.claude\skills\(Win)または~/.claude/skills/(Mac)へ移動 - 4. Claude Code を再起動
⚠️ ダウンロード・利用は自己責任でお願いします。当サイトは内容・動作・安全性について責任を負いません。
🎯 このSkillでできること
下記の説明文を読むと、このSkillがあなたに何をしてくれるかが分かります。Claudeにこの分野の依頼をすると、自動で発動します。
📦 インストール方法 (3ステップ)
- 1. 上の「ダウンロード」ボタンを押して .skill ファイルを取得
- 2. ファイル名の拡張子を .skill から .zip に変えて展開(macは自動展開可)
- 3. 展開してできたフォルダを、ホームフォルダの
.claude/skills/に置く- · macOS / Linux:
~/.claude/skills/ - · Windows:
%USERPROFILE%\.claude\skills\
- · macOS / Linux:
Claude Code を再起動すれば完了。「このSkillを使って…」と話しかけなくても、関連する依頼で自動的に呼び出されます。
詳しい使い方ガイドを見る →- 最終更新
- 2026-05-18
- 取得日時
- 2026-05-18
- 同梱ファイル
- 1
📖 Skill本文(日本語訳)
※ 原文(英語/中国語)を Gemini で日本語化したものです。Claude 自身は原文を読みます。誤訳がある場合は原文をご確認ください。
🪞 GPT Image 2 — ChatGPT サブスクリプション経由の画像生成
既存の ChatGPT Plus または Pro サブスクリプションを使用して、エージェント内で GPT Image 2 (ChatGPT Images 2.0) で画像を生成します。OpenAI の別途アクセス、Fal または Replicate トークン、画像ごとの課金は不要です。
テキストから画像、画像から画像の編集、スタイル転送、およびマルチリファレンス構成が可能です。すべて、すでにログインしているローカルの codex CLI を通じて実行されます。
ご注意ください — このスキルには、ChatGPT Plus または Pro サブスクリプション に加えて、ローカルにインストールされた Codex CLI が必要です。 どちらもお持ちでない場合は、RunComfy 経由でブラウザで GPT Image 2 を使用できます。ホストされており、ChatGPT サブスクリプションやローカルインストールは不要です (RunComfy アカウントが必要です)。
- テキストから画像: runcomfy.com/models/openai/gpt-image-2/text-to-image
- 画像編集 (i2i): runcomfy.com/models/openai/gpt-image-2/edit
このドキュメントの残りの部分では、ユーザーが ChatGPT サブスクリプションを持っているエージェント向けのローカル Codex CLI フローについて説明します。
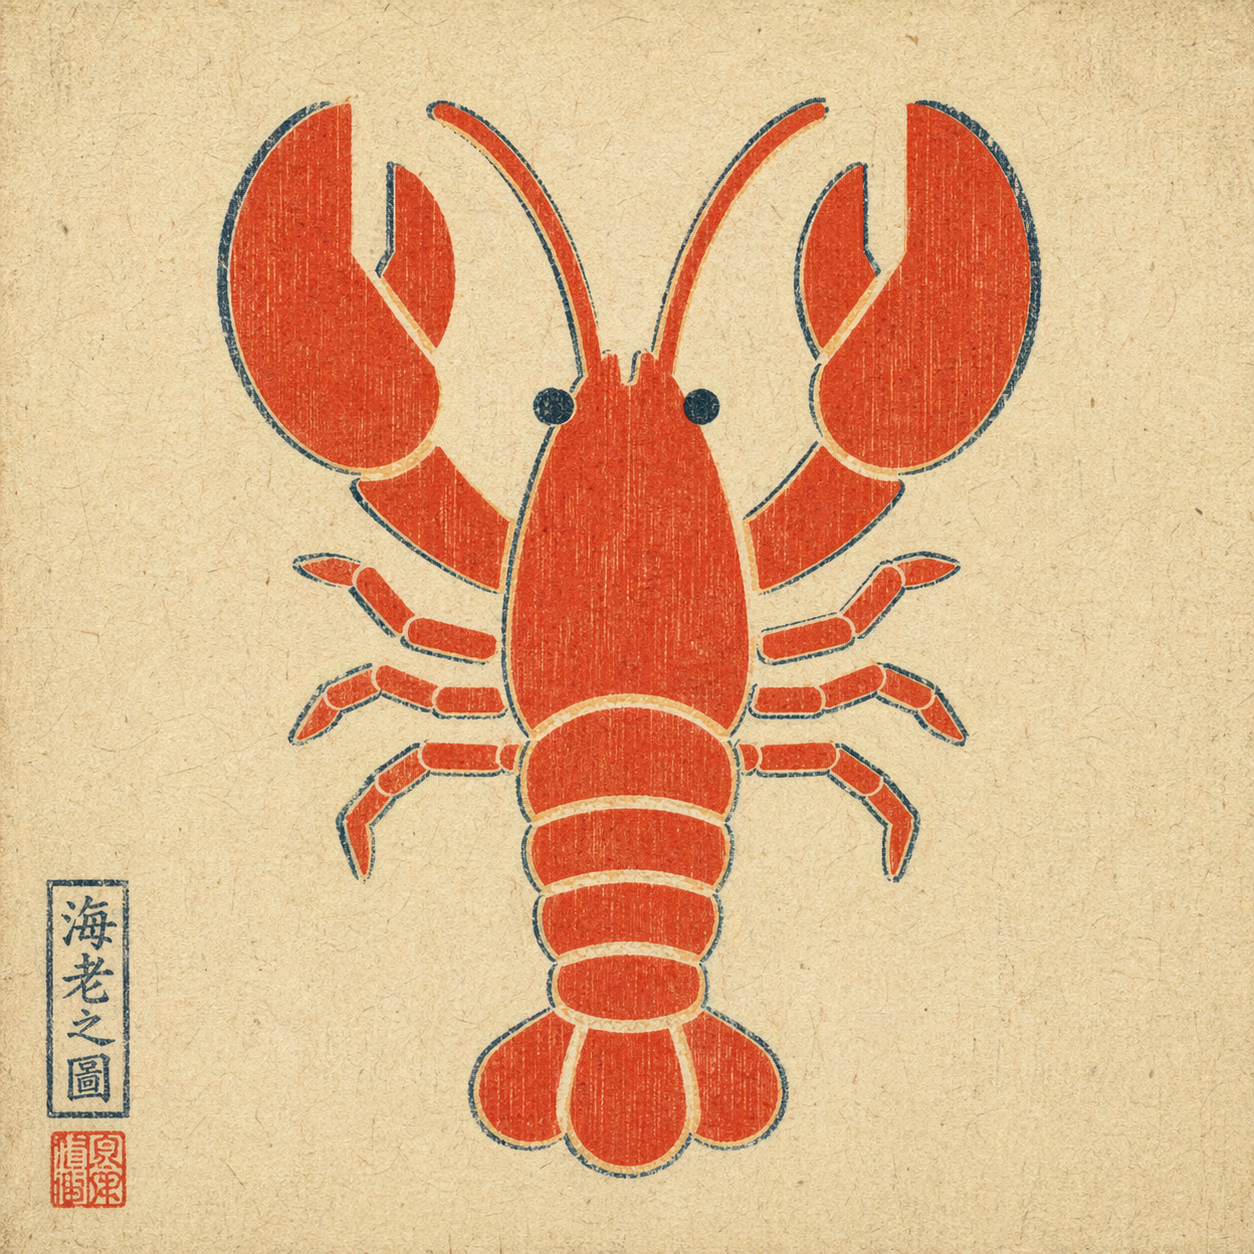
出力例: シンプルなフラットカラーのアイコンを、浮世絵スタイルで --ref を使用して再描画 — 構図は保持され、レンダリングは変更され、モデルによってプロンプトなしで時代に合った赤い印章が追加されています。
トリガーするタイミング
ユーザーが ChatGPT サブスクリプション経由で GPT Image 2 を明示的に要求した場合にトリガーします。例:
- 「GPT Image 2 を使用」/「gpt-image-2 を使用」/「ChatGPT Images 2.0 を使用」
- 「Image 2 を使用」/「image 2 でこれを」
- 参照画像を添付して、リミックス/編集/リスタイルを要求した場合
ユーザーがこのルートを指定しなかった場合は、単なる「画像を生成」というリクエストに対して自動的にトリガーしないでください。指定した場合は、HTML モックアップ、スクリーンショット、または別の画像モデルにサイレントにフォールバックしないでください。
呼び出し方法
単一の bash スクリプトがすべてを処理します。適切なフラグを使用して codex exec を実行し、永続化されたセッションロールアウトから生成された画像をデコードします。
テキストから画像:
bash scripts/gen.sh \
  --prompt "<ユーザーの生のプロンプト>" \
  --out <absolute/path/to/output.png>
画像から画像 (マルチリファレンス構成の場合、参照フラグは繰り返し可能です):
bash scripts/gen.sh \
  --prompt "<ユーザーの生のプロンプト、例: '水彩で再描画'>" \
  --ref /absolute/path/to/reference.png \
  --out <absolute/path/to/output.png>
オプション: --timeout-sec 300 (デフォルト 300)。
デフォルトの動作
- ユーザーのプロンプトを生のまま渡します。 ユーザーが要求しない限り、翻訳、洗練、またはスタイル修飾子を追加しないでください。
- 出力パスを選択します。 ユーザーが指定しない場合は、現在の作業ディレクトリの
./image-<YYYYMMDD-HHMMSS>.pngをデフォルトにします。 - 画像を配信します。 スクリプトが成功したら、出力ファイルを表示/添付します。「完了、パス X を参照」で停止しないでください。
- テキストの多いレイアウトでも問題ありません。 Image 2 は、インフォグラフィックやタイムラインのプロンプトをうまく処理します。プロンプトにテキストが多いという理由だけで、先制的に警告しないでください。
厳しい制約
- 許可なくルートを切り替えないでください。ユーザーが「GPT Image 2 を使用」と言った場合、DALL·E、Midjourney、HTML モックアップ、または手動のスクリーンショットワークフローに置き換えないでください。
- 要求されない限り、プロンプトを書き換えないでください。
- このスキルがローカルの
codexログインと、画像生成の資格を持つ有効な ChatGPT サブスクリプションなしでは機能しないことを示唆しないでください。
前提条件
codexCLI のインストール —brew install codexまたは openai/codex を参照してください。- Image 2 を含む ChatGPT プランでログイン —
codex login。 - PATH 上の
python3(macOS に付属; Linux ではapt install python3)。
このスキル自体では、画像生成機能は付与されません。ユーザーが ChatGPT サブスクリプションを通じてすでに持っている機能を公開します。
終了コード
| code | meaning |
|---|---|
| 0 | 成功 — 出力パスが stdout に出力されました |
| 2 | 不正な引数 |
| 3 | codex または python3 CLI が見つかりません |
| 4 | --ref ファイルが存在しません |
| 5 | codex exec が失敗しました (認証? ネットワーク? モデル?) |
| 6 | 新しいセッションファイルが検出されませんでした |
| 7 | imagegen が画像ペイロードを生成しませんでした (機能が有効になっていない、クォータ、または機能が拒否されました) |
失敗した場合は、ユーザーに完全な stderr をダンプする代わりに、1 文でレイヤーの名前を記述してください。
仕組み
codex CLI は、ログイン済みの ChatGPT セッションを再利用し、imagegen ツールを公開します (image_generation 機能フラグの背後にゲートされています)。スクリプトは次のことを行います。
- 実行前に
~/.codex/sessions/のスナップショットを作成します codex exec --enable image_generation --sandbox read-only ...を実行します (各参照画像に対して-i <file>を使用)- セッションディレクトリを比較し、
scripts/extract_image.pyを呼び出して、すべての新しいロールアウト JSONL で base64 画像ペイロード (PNG / JPEG / WebP マジックヘッダー一致) をスキャンします - 一致する最大の blob をデコードし、
--outに書き込みます
codex-cli 0.111.0 以降で他のラッパーが間違える可能性のある、自明ではない 2 つのフラグ:
--enable image_generationは必須です。この機能はまだ開発中で、デフォルトではオフになっています。--ephemeralは使用してはなりません — 一時的なセッションは永続化されないため、画像ペイロードの保存場所がありません。
データ処理
スクリプトは意図的に狭い範囲に限定されています。
- 独自の
codex exec呼び出しによって作成されたセッションロールアウトファイルのみを読み取ります。セッションディレクトリは呼び出し前にスナップショットされ、呼び出し後に比較されるため、以前の~/.codex/sessions/*ファイル (関連のない Codex 会話が含まれている可能性があります) は、決して触れられたり、読み取られたり、送信されたりしません。 - 2 種類のファイルのみを書き込みます。呼び出し元の
--outパスにある出力 PNG と、トラップを介して終了時に自動的に削除される短命のmktempログです。 - 環境変数は読み取られません。資格情報は要求されません。以下の他のパスはありません
(原文がここで切り詰められています)
📜 原文 SKILL.md(Claudeが読む英語/中国語)を展開
🪞 GPT Image 2 — Image Generation via Your ChatGPT Subscription
Generate images with GPT Image 2 (ChatGPT Images 2.0) inside your agent, using your existing ChatGPT Plus or Pro subscription — no separate OpenAI access, no Fal or Replicate tokens, no per-image billing.
Text-to-image, image-to-image editing, style transfer, and multi-reference composition. Runs entirely through the local codex CLI you're already logged into.
Heads up — this skill requires a ChatGPT Plus or Pro subscription plus the Codex CLI installed locally. If you have neither, you can use GPT Image 2 in the browser via RunComfy instead — hosted, no ChatGPT subscription or local install needed (RunComfy account required):
- Text-to-image: runcomfy.com/models/openai/gpt-image-2/text-to-image
- Image edit (i2i): runcomfy.com/models/openai/gpt-image-2/edit
The rest of this document covers the local Codex CLI flow for agents whose user has a ChatGPT subscription.
Example output: a plain flat-color icon repainted via --ref in ukiyo-e style — composition preserved, rendering swapped, period-appropriate red seal added by the model unprompted.
When to trigger
Trigger when the user explicitly asks for GPT Image 2 via their ChatGPT subscription, for example:
- "use GPT Image 2" / "use gpt-image-2" / "use ChatGPT Images 2.0"
- "use Image 2" / "image 2 this"
- attached a reference image and asked to remix / edit / restyle it
Do not auto-trigger for a plain "generate an image" request if the user didn't specify this route. If they did specify it, do not silently fall back to HTML mockups, screenshots, or a different image model.
How to invoke
A single bash script handles everything: runs codex exec with the right flags, then decodes the generated image from the persisted session rollout.
Text-to-image:
bash scripts/gen.sh \
  --prompt "<user's raw prompt>" \
  --out <absolute/path/to/output.png>
Image-to-image (reference flag is repeatable for multi-reference composition):
bash scripts/gen.sh \
  --prompt "<user's raw prompt, e.g. 'repaint in watercolor'>" \
  --ref /absolute/path/to/reference.png \
  --out <absolute/path/to/output.png>
Optional: --timeout-sec 300 (default 300).
Default behavior
- Pass the user's prompt through raw. Do not translate, polish, or add style modifiers unless the user asked for it.
- Choose the output path. Default to
./image-<YYYYMMDD-HHMMSS>.pngin the current working directory if the user didn't specify. - Deliver the image. After the script succeeds, display / attach the output file. Do not stop at "done, see path X".
- Text-heavy layouts are fine. Image 2 handles infographics and timeline prompts well. Do not preemptively warn just because a prompt has a lot of text.
Hard constraints
- Do not switch routes without permission. If the user said "use GPT Image 2", do not substitute DALL·E, Midjourney, an HTML mockup, or a manual screenshot workflow.
- Do not rewrite the prompt unless asked.
- Do not imply this skill works without a local
codexlogin and a valid ChatGPT subscription with image-generation entitlement.
Prerequisites
codexCLI installed —brew install codexor see openai/codex.- Logged in with a ChatGPT plan that includes Image 2 —
codex login. python3on PATH (ships with macOS;apt install python3on Linux).
This skill does not grant image-generation capability on its own. It exposes the capability the user already has through their ChatGPT subscription.
Exit codes
| code | meaning |
|---|---|
| 0 | success — output path printed on stdout |
| 2 | bad args |
| 3 | codex or python3 CLI missing |
| 4 | --ref file does not exist |
| 5 | codex exec failed (auth? network? model?) |
| 6 | no new session file detected |
| 7 | imagegen did not produce an image payload (feature not enabled, quota, or capability refused) |
On failure, name the layer in one sentence instead of dumping the full stderr at the user.
How it works
The codex CLI reuses the logged-in ChatGPT session and exposes an imagegen tool (gated behind the image_generation feature flag). The script:
- snapshots
~/.codex/sessions/before the run - runs
codex exec --enable image_generation --sandbox read-only ...(with-i <file>for each reference image) - diffs the sessions directory, then invokes
scripts/extract_image.pyto scan every new rollout JSONL for a base64 image payload (PNG / JPEG / WebP magic-header match) - decodes the largest matching blob and writes it to
--out
Two non-obvious flags other wrappers get wrong on codex-cli 0.111.0+:
--enable image_generationis required; the feature is still under-development and off by default.--ephemeralmust not be used — ephemeral sessions aren't persisted, so the image payload has nowhere to live.
Data handling
The script is narrowly scoped on purpose:
- It reads only session rollout files created by its own
codex execinvocation. The sessions directory is snapshotted before the call and diffed after, so any prior~/.codex/sessions/*files (which may contain unrelated Codex conversations) are never touched, read, or transmitted. - It writes only two kinds of file: the output PNG at the caller's
--outpath, and short-livedmktemplogs that are auto-deleted on exit via a trap. - No environment variables are read. No credentials are requested. No other paths under
~/.codex/are accessed. - No network calls leave this skill. The only outbound traffic is the one made by the
codexCLI itself (to OpenAI, using the user's existing ChatGPT login) — this skill does not add endpoints, telemetry, or callbacks.
What this skill is not
Not a direct OpenAI API client. Not a capability grant — it depends on the user's working Codex CLI login. Not a multi-tenant service (one call per invocation; concurrent calls are serialized by the filesystem-snapshot diff).